Considered one of the most common video streaming software programs, vMix is a top choice for many professional broadcasters.
vMix has a comprehensive selection of features for live streaming, including multiple input options (DVS, webcams, playlists, sound cards, cameras, etc.), support for Network Device Interface (NDI), support for multiple video and audio file types, 4K UHD streaming, etc.
A lot of Castr users have chosen vMix as their preferred software encoder. In this tutorial, we’ll show you how to connect Castr to vMix through the Custom RTMP Server.
How to Connect Castr to vMix
Note: Castr has yet to provide direct integration in vMix. So as of now, the best way to connect these programs is through the Custom RTMP Server option in vMix.
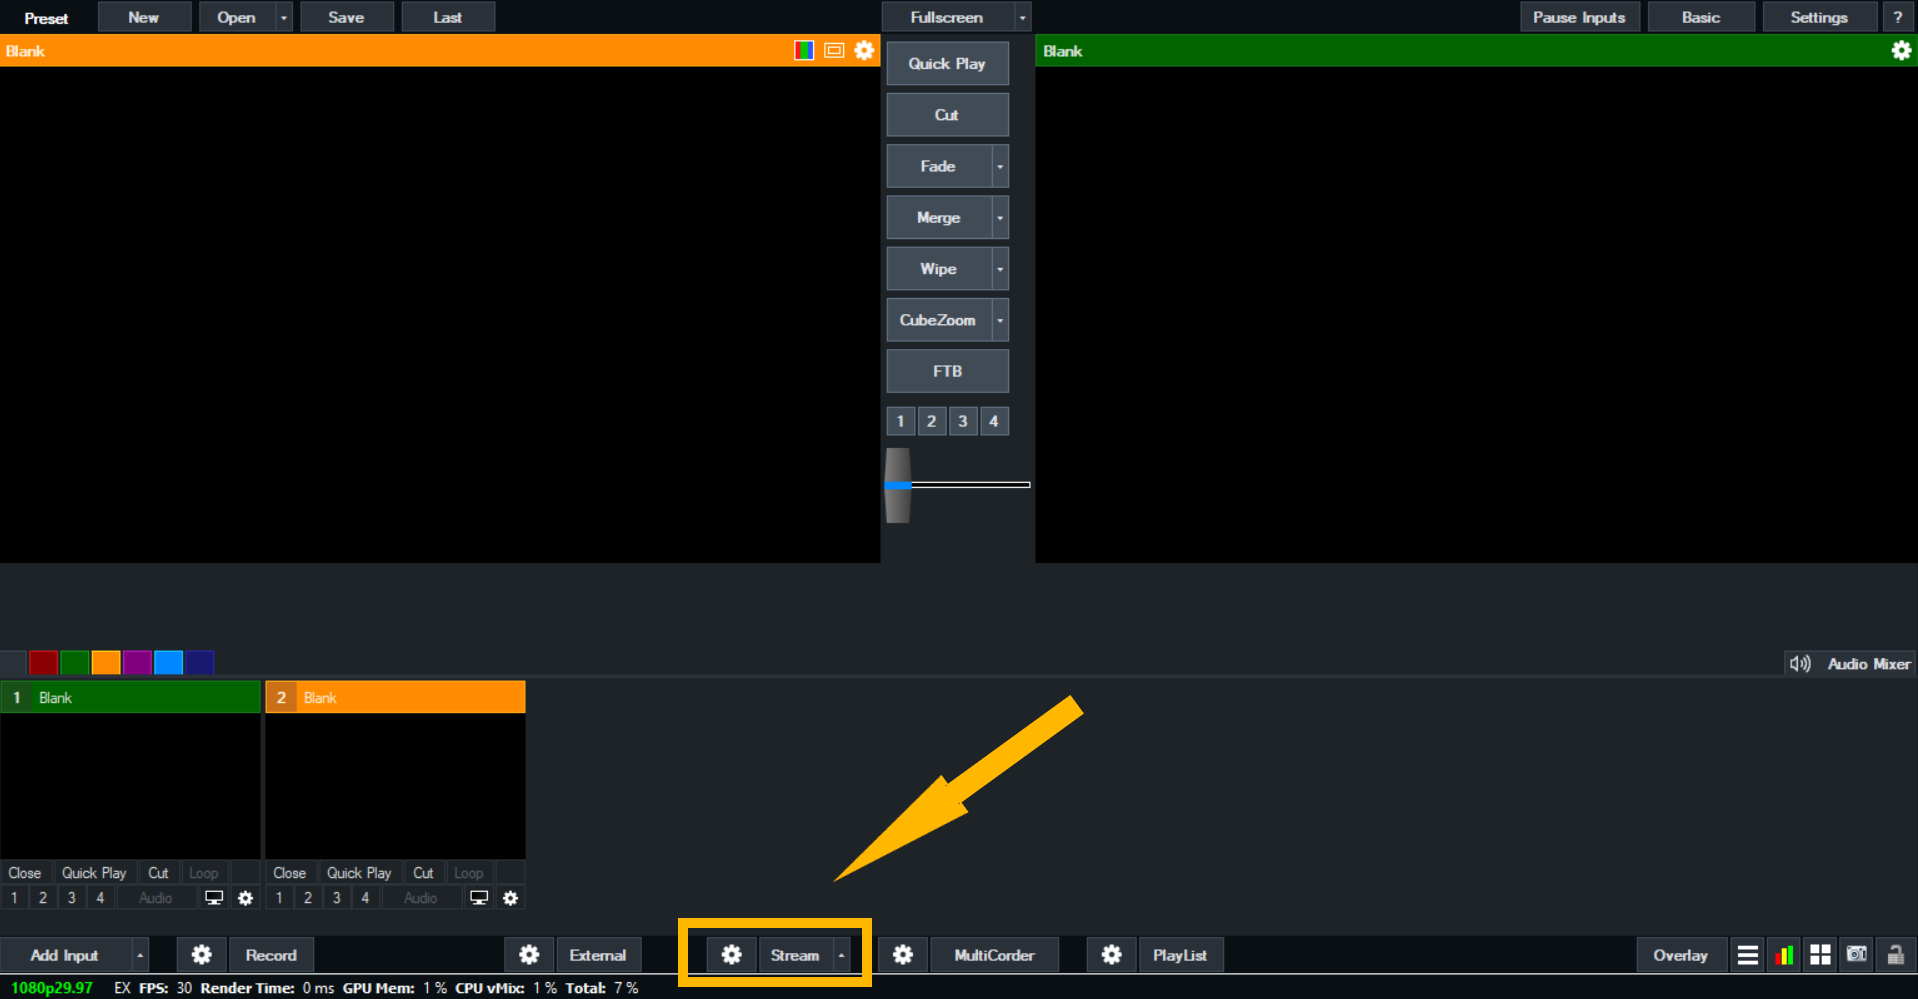
Step 1: Open vMix. Download the latest version here
Step 2: Click the Stream settings

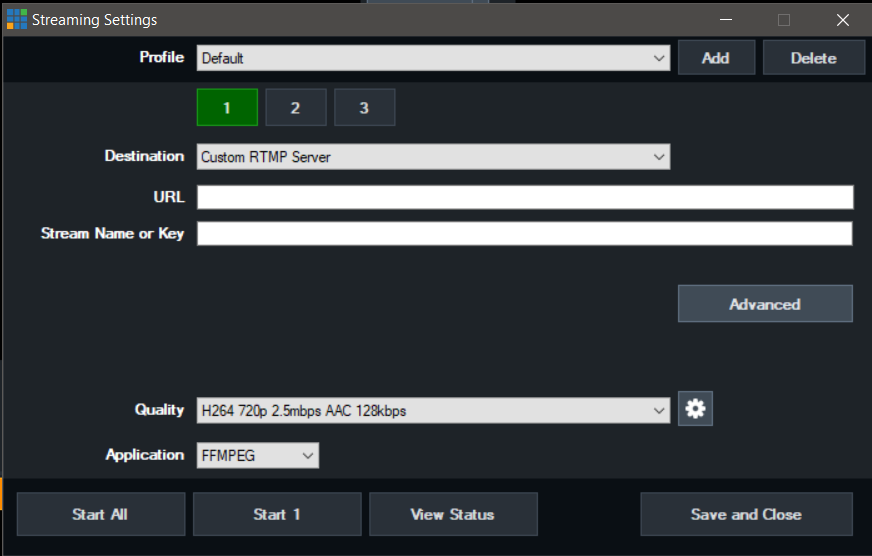
Step 3: In the Destination section, select Custom RTMP Server

Step 4: Log in to your Castr account. If you don’t have a Castr account, create a new one here.
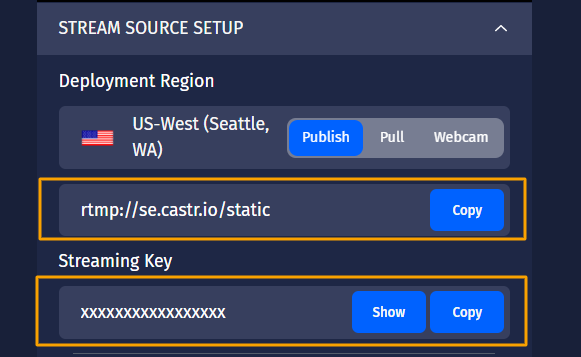
Step 5: Open a Livestream project. Then copy the RTMP link and Streaming Key.

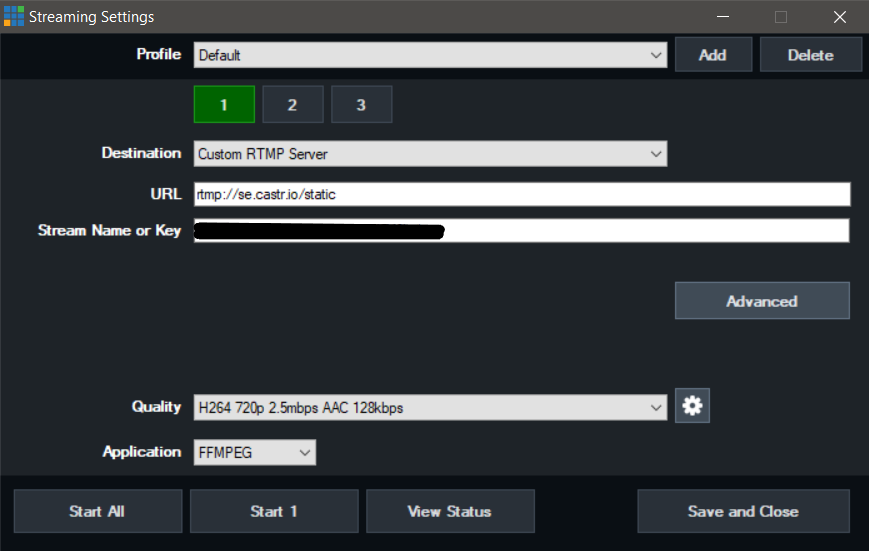
Step 6: Paste the RTMP link and Streaming Key to the vMix Settings. Then click Save and Close.

Now you’re connected to vMix. You’ll see the preview in your Castr dashboard. If the preview doesn’t show up, click the Stream button again to start streaming.

What’s next?
We hope you find this article helpful to start streaming from vMix to Castr. If you need further help, check out the Help Center or contact our 24/7 live chat for more support.
What’s next? See How to Set up OBS When Streaming With Castr.
Join 200,000+ streamers worldwide
With Castr, you can easily livestream videos on any platform in no time.
No Castr Branding
We do not include our branding on your videos.
No Commitment
No contracts. Cancel or change your plans anytime.
24/7 Support
Highly skilled in-house engineers ready to help.


