Building an in-house video production studio may sound daunting. However, it’s actually simple once you’ve gotten a hold of the required components. In this blog, we will cover through all the equipment you need to build a studio. We’ll also mention the tools you need for video livestreaming.
If you have digital content in your marketing plan, chances are that you have already incorporated videos in your strategy.
Video content and video livestreaming have permeated into how brands reach their customers. Internet users watched 1.1 billion hours of live video in 2019. More than 80% of people choose live videos over social media posts. And conversion-wise, one minute of video can be equal to 1.8 million words, according to Forrester.
Many companies have created their in-house production studio. Having a studio in your office gives you more control over video execution. It can also save a lot of costs on logistics and hiring a production team.
Table of Contents
- Why you need a video production studio
- Video production studio equipment: the essentials
- Camera
- Tripod
- External microphone
- Lighting
- Background
- Optional equipment
- Tools for video livestreaming
Why it’s Better to Have a Video Production Studio In-house
Your team can save significant time and costs by having an in-house studio.
Here’s why.
Renting a studio can cost around $1,000 or more per hour. Hiring an outsource production crew can cost you hundreds of thousands of dollars per project. The travel time from your office to the filming location and the costs also add up to the inefficiency.
An in-house production video eliminates these hassles. And if you need to reshoot or film in small sessions, you wouldn’t have to pay any extra dollars.
Video Production Studio Equipment: the Essentials
Before deciding which gear to buy, we suggest you ask yourself these questions. They will help you understand your video objectives and narrow down your options:
- What is the main purpose of having a production studio for your team?
- What is your allowed budget?
- What types of video are you going to record?
- Does your office have a dedicated location for the studio?
Camera
Video production is impossible without cameras. A decent camera will determine the most part of your video quality. Having a good camera helps you achieve crisp, professional video footage. It also saves your video editor from the hassle of fixing footage during post-production. Even if your team is under a low budget, this is the one item that you should not compromise.
There’s a huge variety of options in the market. Below are the camera types you may consider:
4K professional camcorder
(Source: Pexel.com | Donald Tong)
A professional video camera can cost from $2,000 to $55,000, or even more. This investment is only worthy if your company wants to produce cinematic videos and your team has enough expertise to make the most of the camera.
Some of our recommendations:
-
-
- SONY PXW – Z100 Pro 4K
- Panasonic 4K 24pCinema/60p Video Camcorder HC-X1000
- Panasonic Professional Camcorder with 20X LEICA DICOMAR Lens – HC-X1.
-
Camcorder/Handycam
(Source: Unsplash | Thomas William)
A much more cost-efficient option is a camcorder – or handycam. A regular camcorder stands around $300 to $2,000 or more. Compared to the 4K professional camcorder, handycams are a lot more, well… handy. It is lightweight, portable, and simple to use. And when compared to a DSLR camera, handycams can shoot long recording sessions.
So if recording conferences, concerts or long events is in your team’s video content plan, a handycam is most suitable.
DSLR
(Source: Pexels.com | Roman Koval)
Many small teams with limited budgets opt for DSLR cameras in their video production. DSLRs are more affordable than professional cameras, customizable, and lightweight.
These cameras are great for capturing short footage, which helps if you plan to shoot a lot of cutaways in your video.
Thanks to its portability, you can capture close-up shots and create out-of-focus backgrounds conveniently with a DSLR. This camera is also compatible with most microphones.
A drawback of DSLRs is their recording time and battery capacity. Depending on the model, some DSLR allows you to record 30 minutes of footage at a time maximum. Battery life for recording without stopping is around 50 to 90 minutes.
If you livestream your video, you can plug your DSLR to your computer via a USB port and allow camera access.
Some of our recommendations:
-
-
- Panasonic Lumix GH5
- Canon EOS-1D X Mark III
- Canon EOS 5D Mark IV
- Nikon D5 or Nikon D6
- Sony Alpha a7 III
-
Webcam
We only recommend this option if 1. You’re producing talking-head videos, and 2. You don’t want to invest in a camera.
Although some webcams can capture quality videos, they do not provide the versatile benefits that a camera has. However, if you want to use webcam as your video source, check out our list of recommended webcams here.
Phone
Smartphone technology has come a long way, especially for photography and videography. For low-budget video projects, this could be a proper solution.
Equip your phone with a lens of your choice to produce cinematic effects, add an external microphone and mount it on a tripod or stabilizer. Film in a well-lit studio and you’ll achieve professional image quality.
Tripod
(Source: Unsplash | Marine Leclerc)
Even when you plan to capture handheld shots, a tripod is still a must. A tripod helps you record still videos for a long time. It also provides stability while you pan and tilt. Camera stabilization contributes to how professional your video looks, for the most part. Your viewers can see the most subtle shakes, especially when it’s a zoom shot.
Having a tripod enhances your video quality with the least amount of effort. Also, keep in mind that a sturdy tripod keeps your camera — the most expensive component in your video gear — safe.
So while there are many cheap options out there, we recommend you go for a more expensive and decent tripod. A cheap tripod can break down easily; and you’ll need to purchase another one.
Some of our recommendations for tripods:
-
-
- Endurax 60” Camera Phone Tripod Stand: $25.99
- Neewer Portable Aluminum Alloy Camera 2-in-1 Tripod Monopod Max: $44.99
- Benro Mach3 TMA28AHD2A: $267.00
- Vanguard Veo 2 GO 265HCBM: $269.99
- Manfrotto 190XPRO Aluminium 4-Section: $649.00
-
External microphone
It is tempting to skip this part and use your camera’s in-built microphone instead. But poor audio can make your viewers drop out in a few seconds. An external microphone gives you more control, crisper sound, and less effort spent in post-production.
For in-house business videos, there are three types of microphones you may consider:
Lavalier
Also called “lav mic” or “lav”, lavalier is a small microphone that you can clip on your shirt. Lav mics are omnidirectional, which means they pick up sounds from every direction.
Lav mics capture crips and clear voice, making them best for talking-head, interview, or tutorial videos. The most apparent advantage of these mics is that they are lightweight and can be tucked under your clothes. Some manufacturers also have wireless lavs.
Boom microphone
If you watch any behind-the-scenes videos of any film production, you may see a crew member holding a pole with a microphone attached. That is a boom operator and the microphone is a boom mic.
A boom mic consists of a boom pole and a shotgun mic. The shotgun mic is unidirectional, meaning it picks up sounds from anywhere you point it. You can use boom mics for videos with dialogues or more than one person talking. And unlike lavs, boom mics can capture the room ambiance sound — if that’s part of your storyboard.
Condenser
A condenser microphone captures the most delicate sounds and high frequencies. Condenser mics are mostly preferred for studio usage. If you produce podcasts (with or without videos), music sessions, or any projects that require studio-quality audio, a condenser microphone is your best go-to.
Lighting
The first thing you need to consider is natural versus artificial lighting. Natural outdoor light on a sunny day can give you the best image quality, or shooting during the golden hour creates dramatic effects. However, you don’t have much control of the outcome with this type of lighting.
For studio lighting, you’ll need a light diffuser — usually a layer of fabric used to scatter light. Light diffusers transmit softer light and prevent glares and shadows. We recommend using softboxes like the Neewer Photography Studio 600W or any similar models.
Here are two lighting setups that you can apply:
Three-point lighting
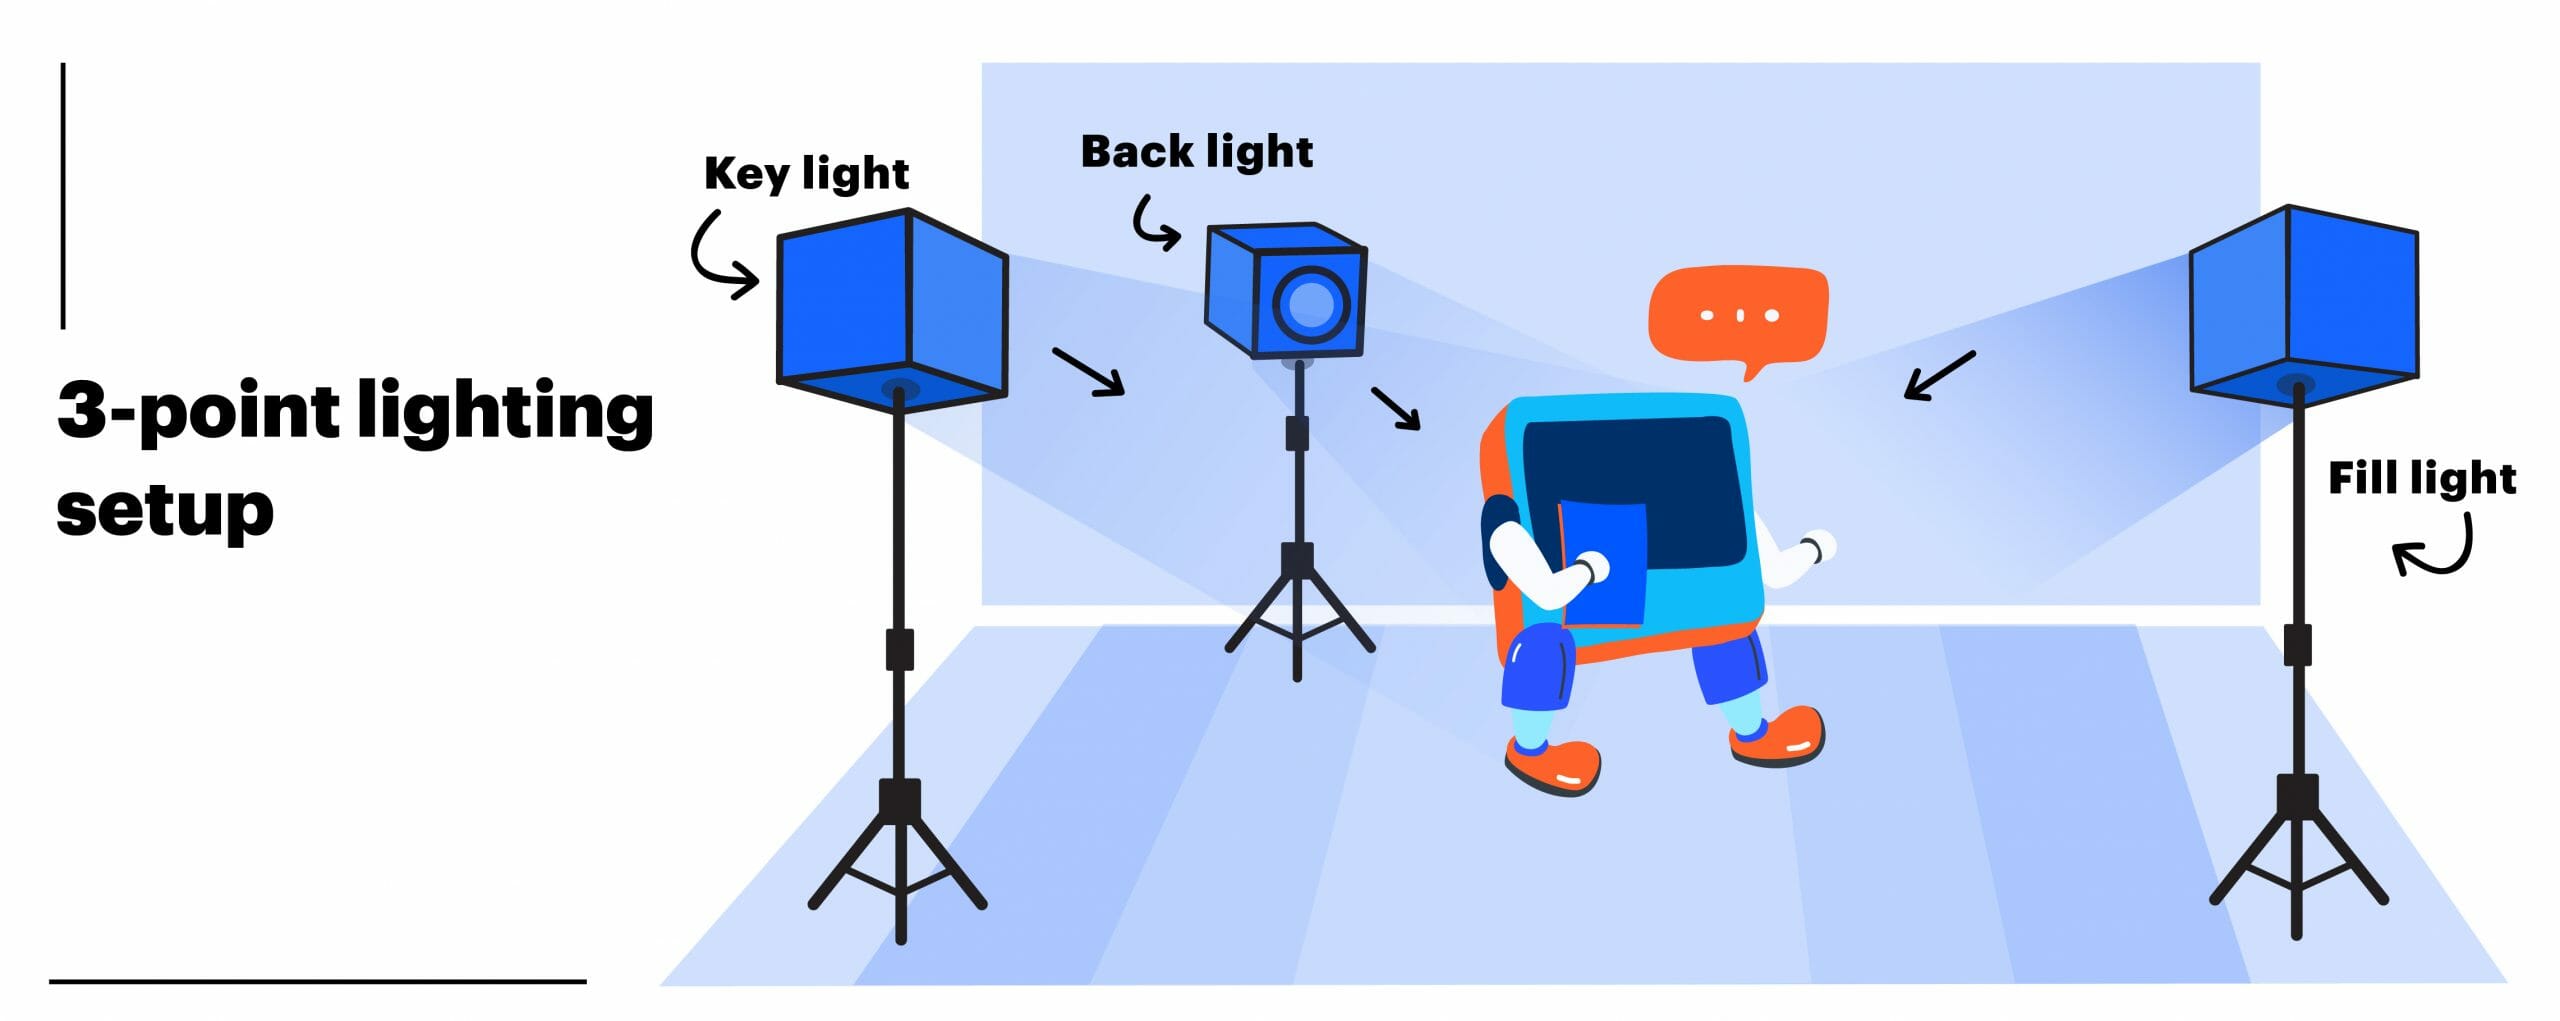
For corporate videos, we recommend that you rely on artificial lighting. If you have a studio room, basic three-point lighting setup is a decent start.
There are three components of this setup. The key light provides the strongest light and is usually placed in front of the subject, at 45-degrees top-down and to the right or left. The fill light, placed on the other side of the keylight, used to “erase” the shadows from the key light. Fill lights are softer and emit less light than key lights.
The back light (or rim light) creates depths of field. This can help separate your subject from the background. It is placed at the back of the setup and out of the camera frame.
Two-point lighting
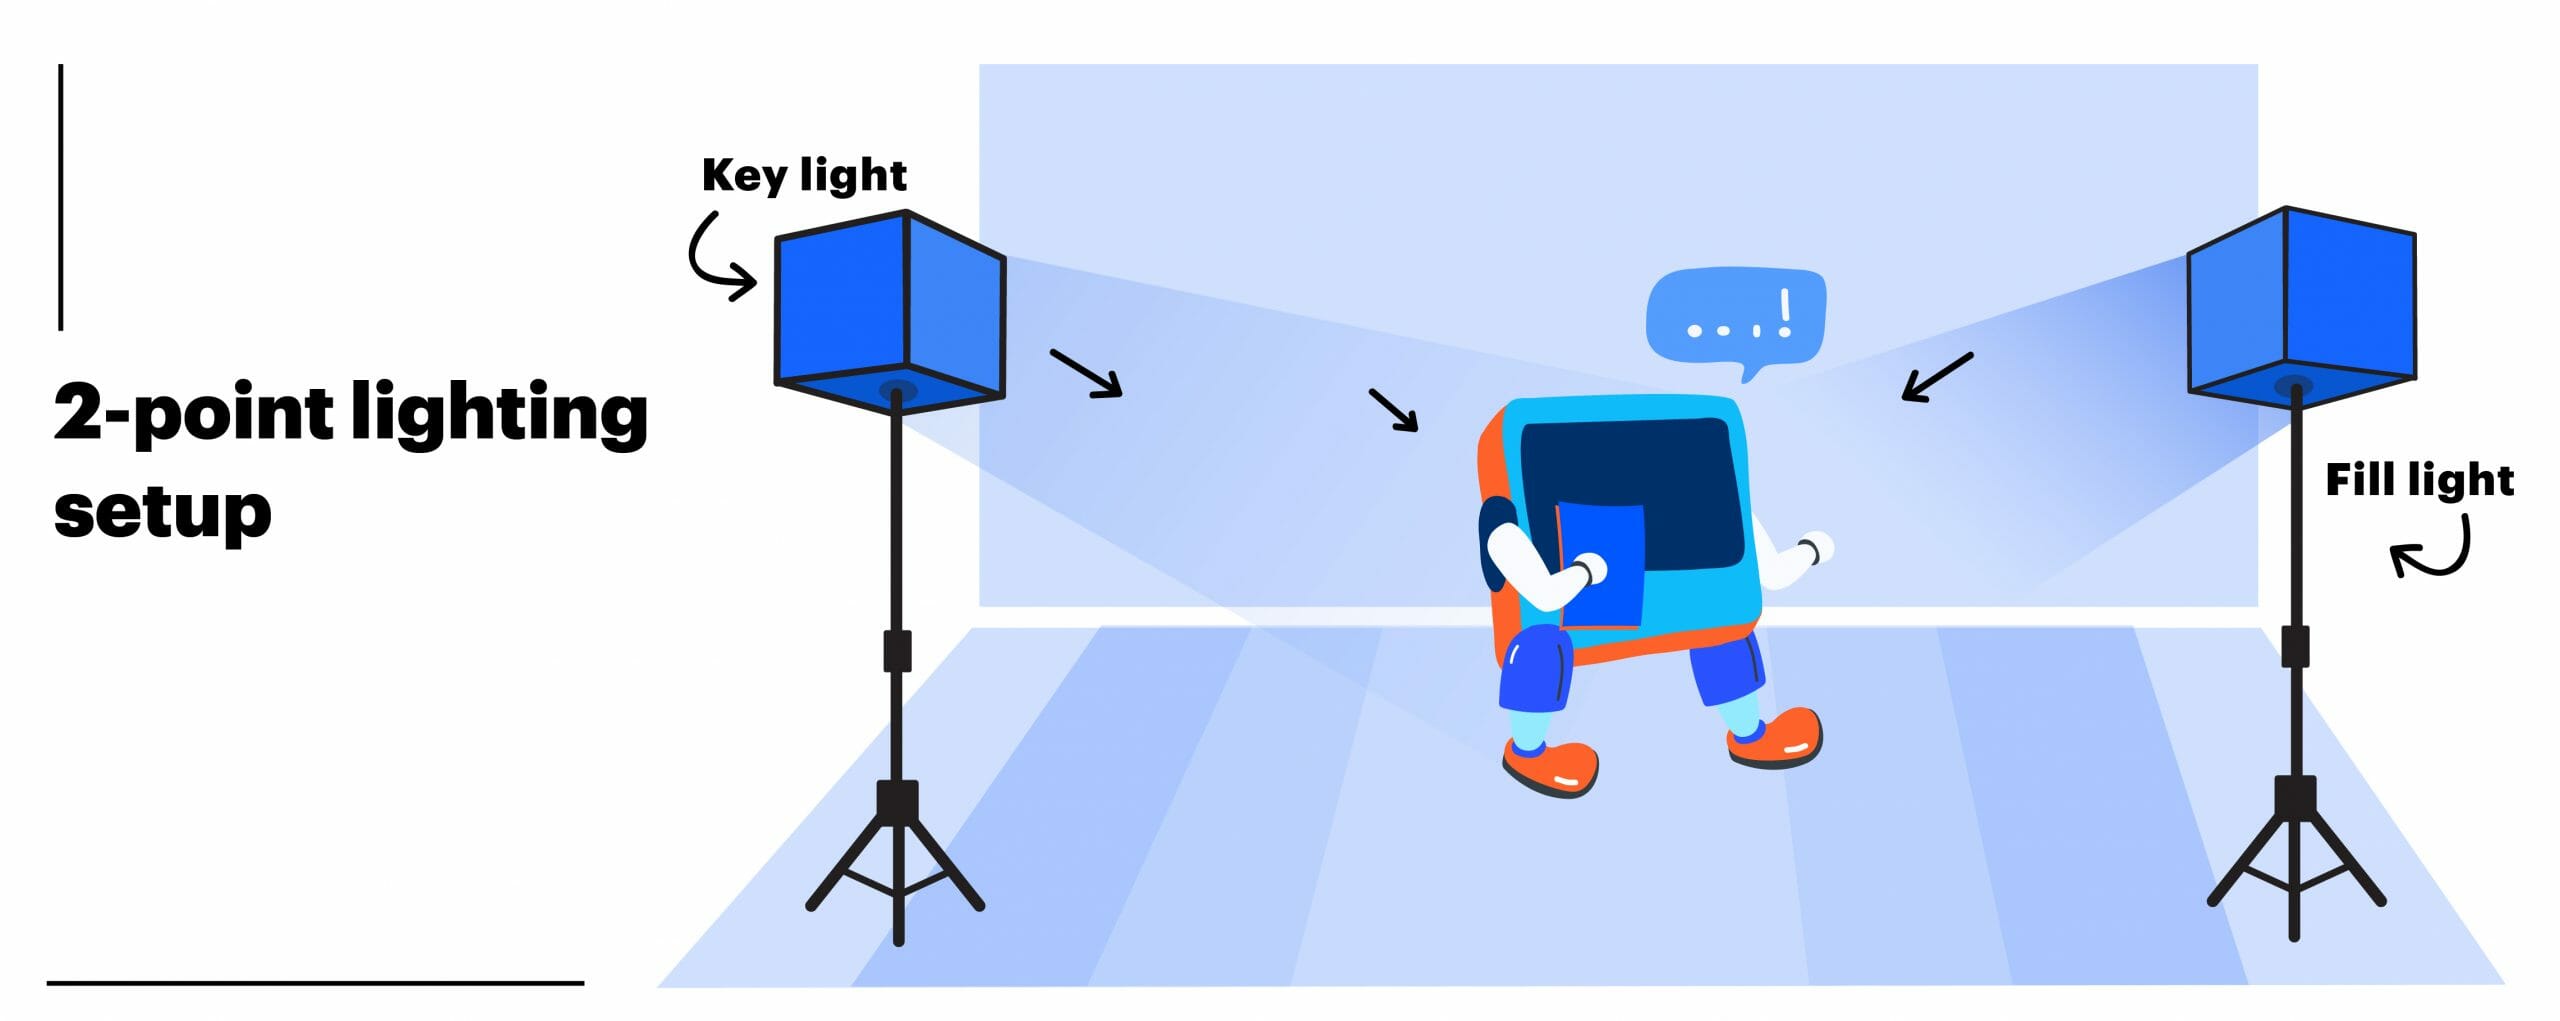
If you want to simplify your setup, you can also try two-point lighting that uses only a key light and a fill light.
Background
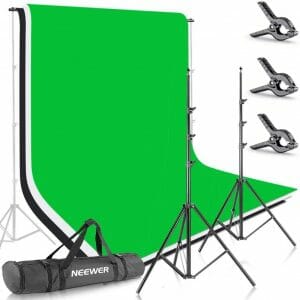
Unless your office has a window view with a beautiful background behind, having a background setup is essential for in-house production. A basic black, white or green screen is most versatile.
Green screens can give you infinite ways to decide which background you want to use. Simply use the chroma-keying feature in most video editing programs while editing your videos. For low-budget projects, you can start with Neewer’s Photo Studio Background System, which costs less than $100.
Optional Equipment
The items above are the essentials for a fundamental video production studio. But if you want to upgrade your kit, here are two equipment pieces to add on:
Secondary camera
Having two cameras allows you to capture one shot from multiple angles. Therefore you’ll have more cutaway footage to diversify your visuals. And if one of your cameras breaks down or runs out of battery midway, you still have a backup.
Teleprompter
A teleprompter, or an autocue, is a device placed in front of the camera that displays a script. This device helps the speaker deliver their messages seamlessly while maintaining eye contact with the camera.
For in-house corporate videos, this is a great gear for managers or C-suite executives to be on screen without having to memorize the script. Prices for teleprompters usually range from as low as $150 to $2,000 or above.
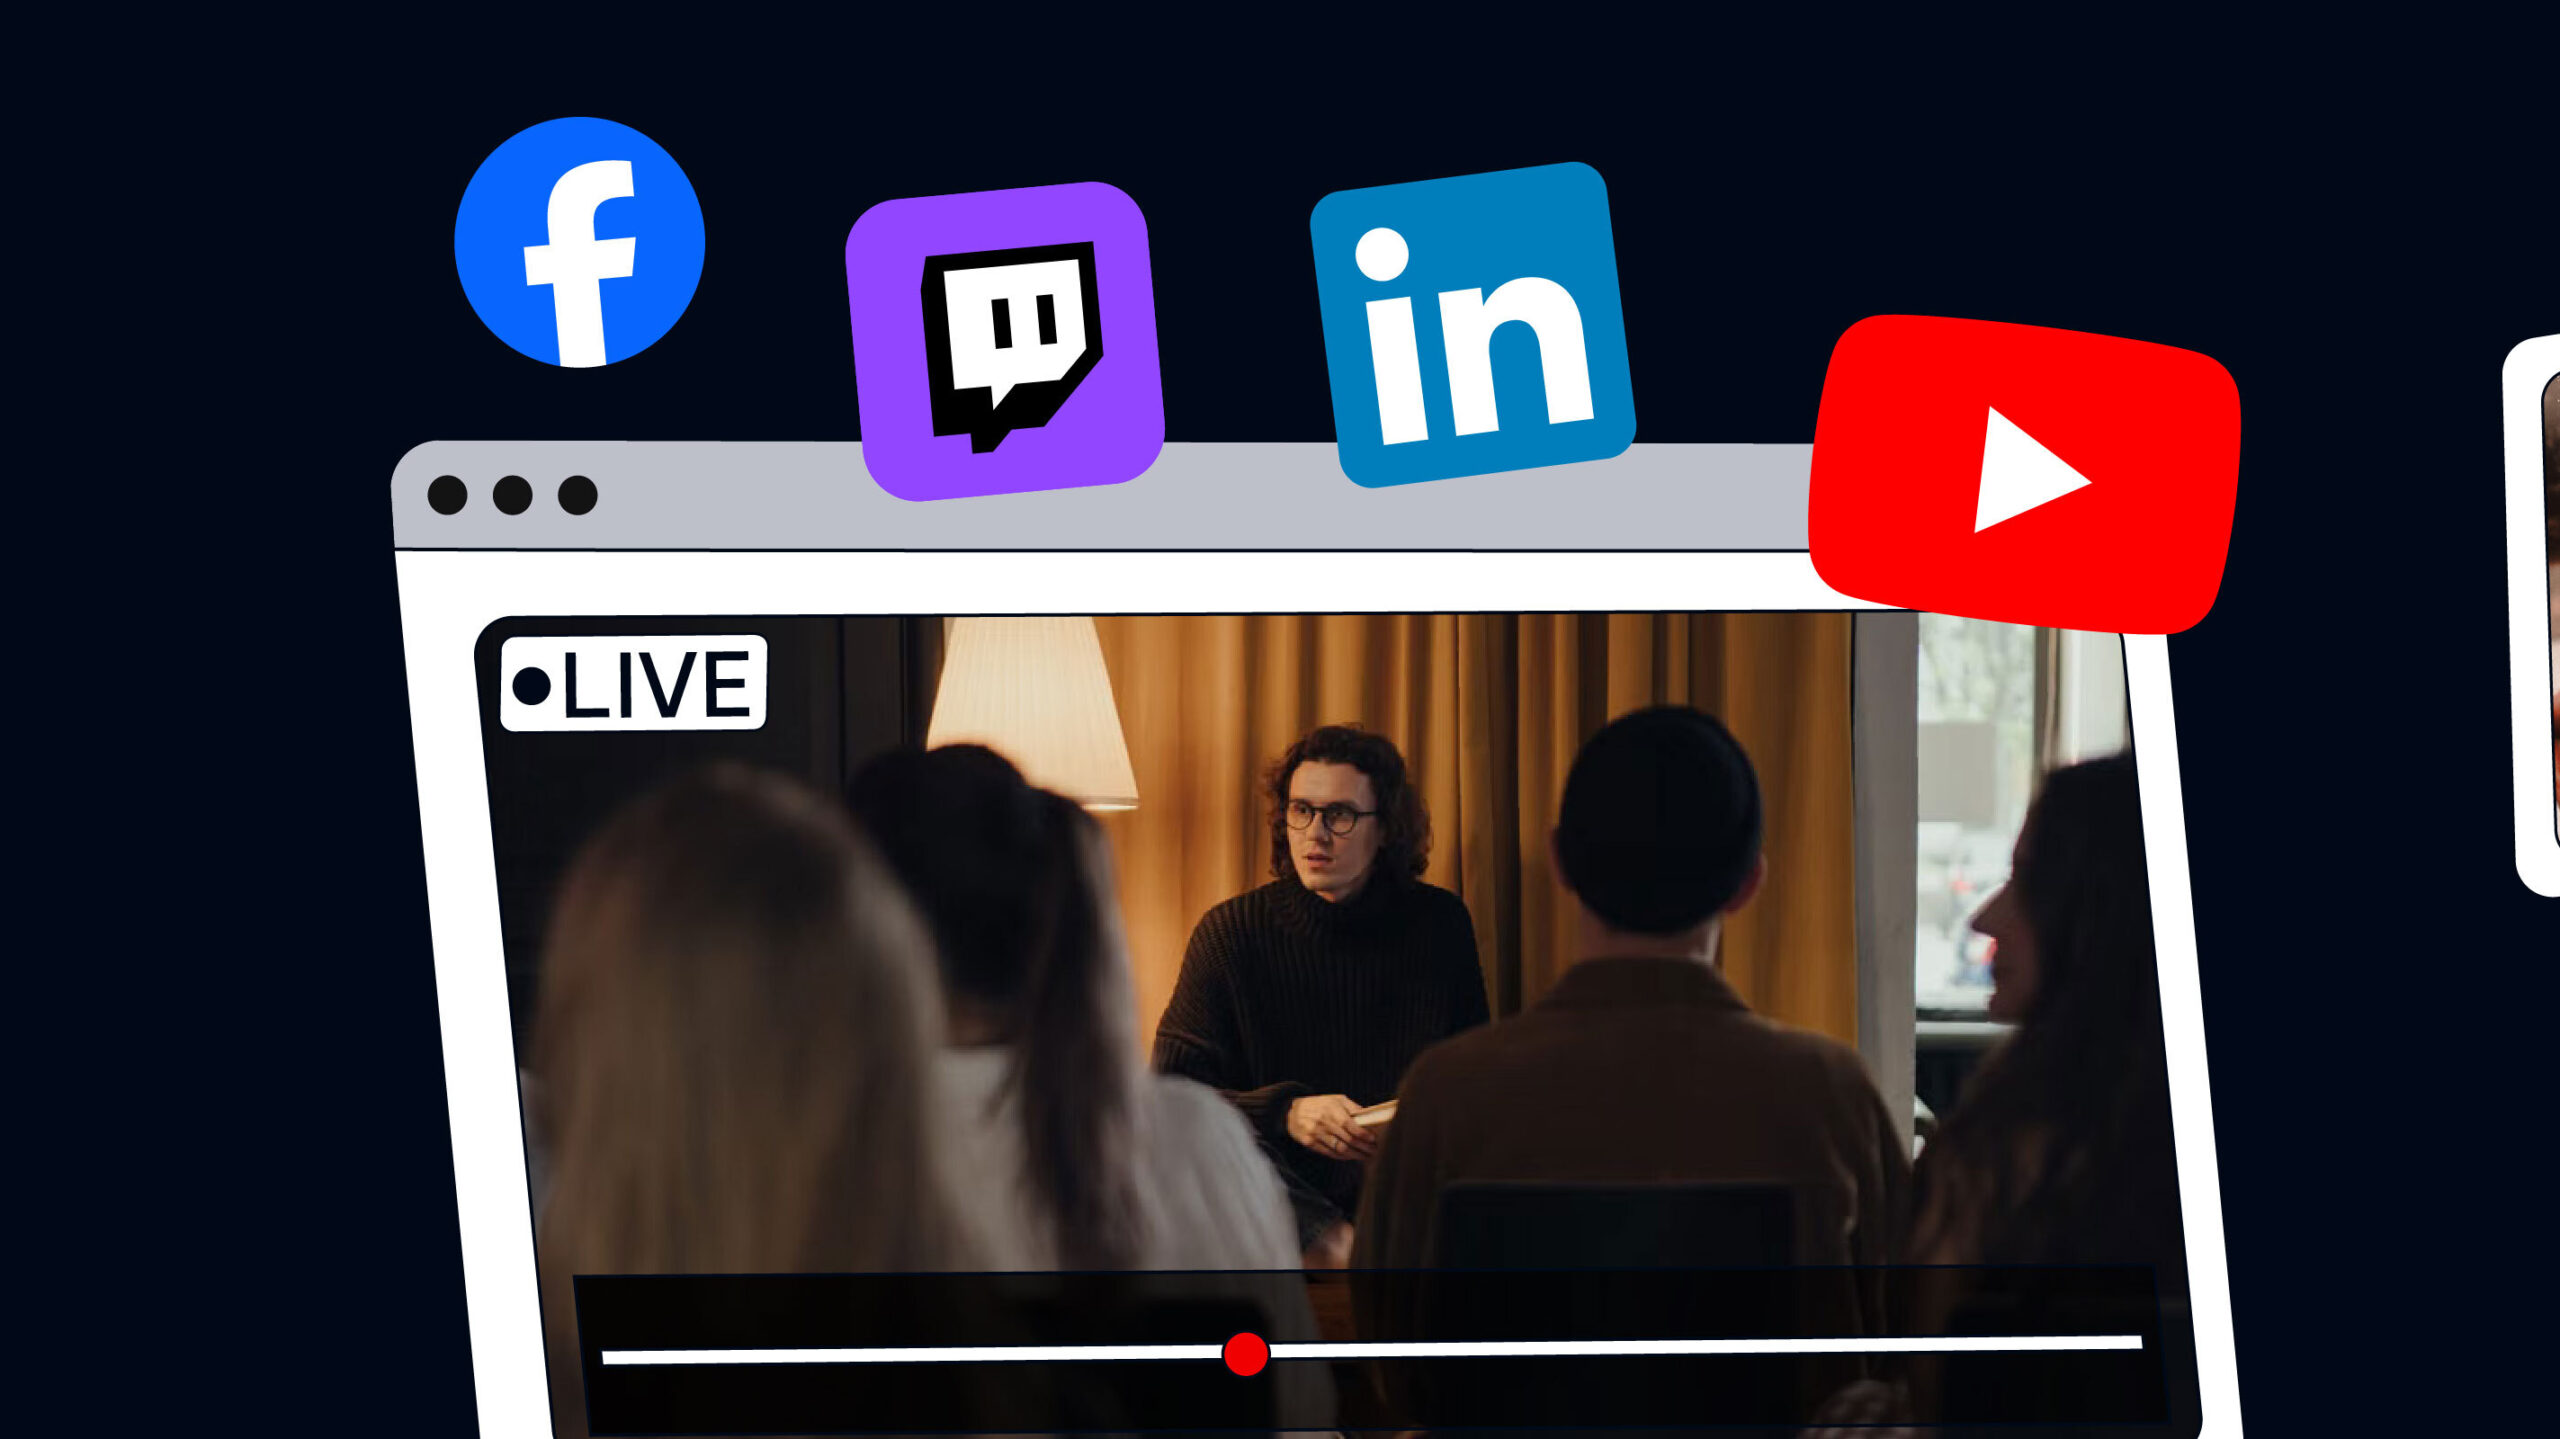
Tools for Video Livestreaming
Having an in-house studio can elevate the visual quality of your livestream. Especially with the COVID-19 situation, many companies have turned to organizing livestream events, from announcements, to panels and conferences.
You can use the exact setup above for livestreaming, with the addition of these items:
-
-
- An encoder (software or hardware). See our recommendations for software encoders here
- If you stream from a DSLR or a camcorder, you’ll need a capture card to connect to your encoder.
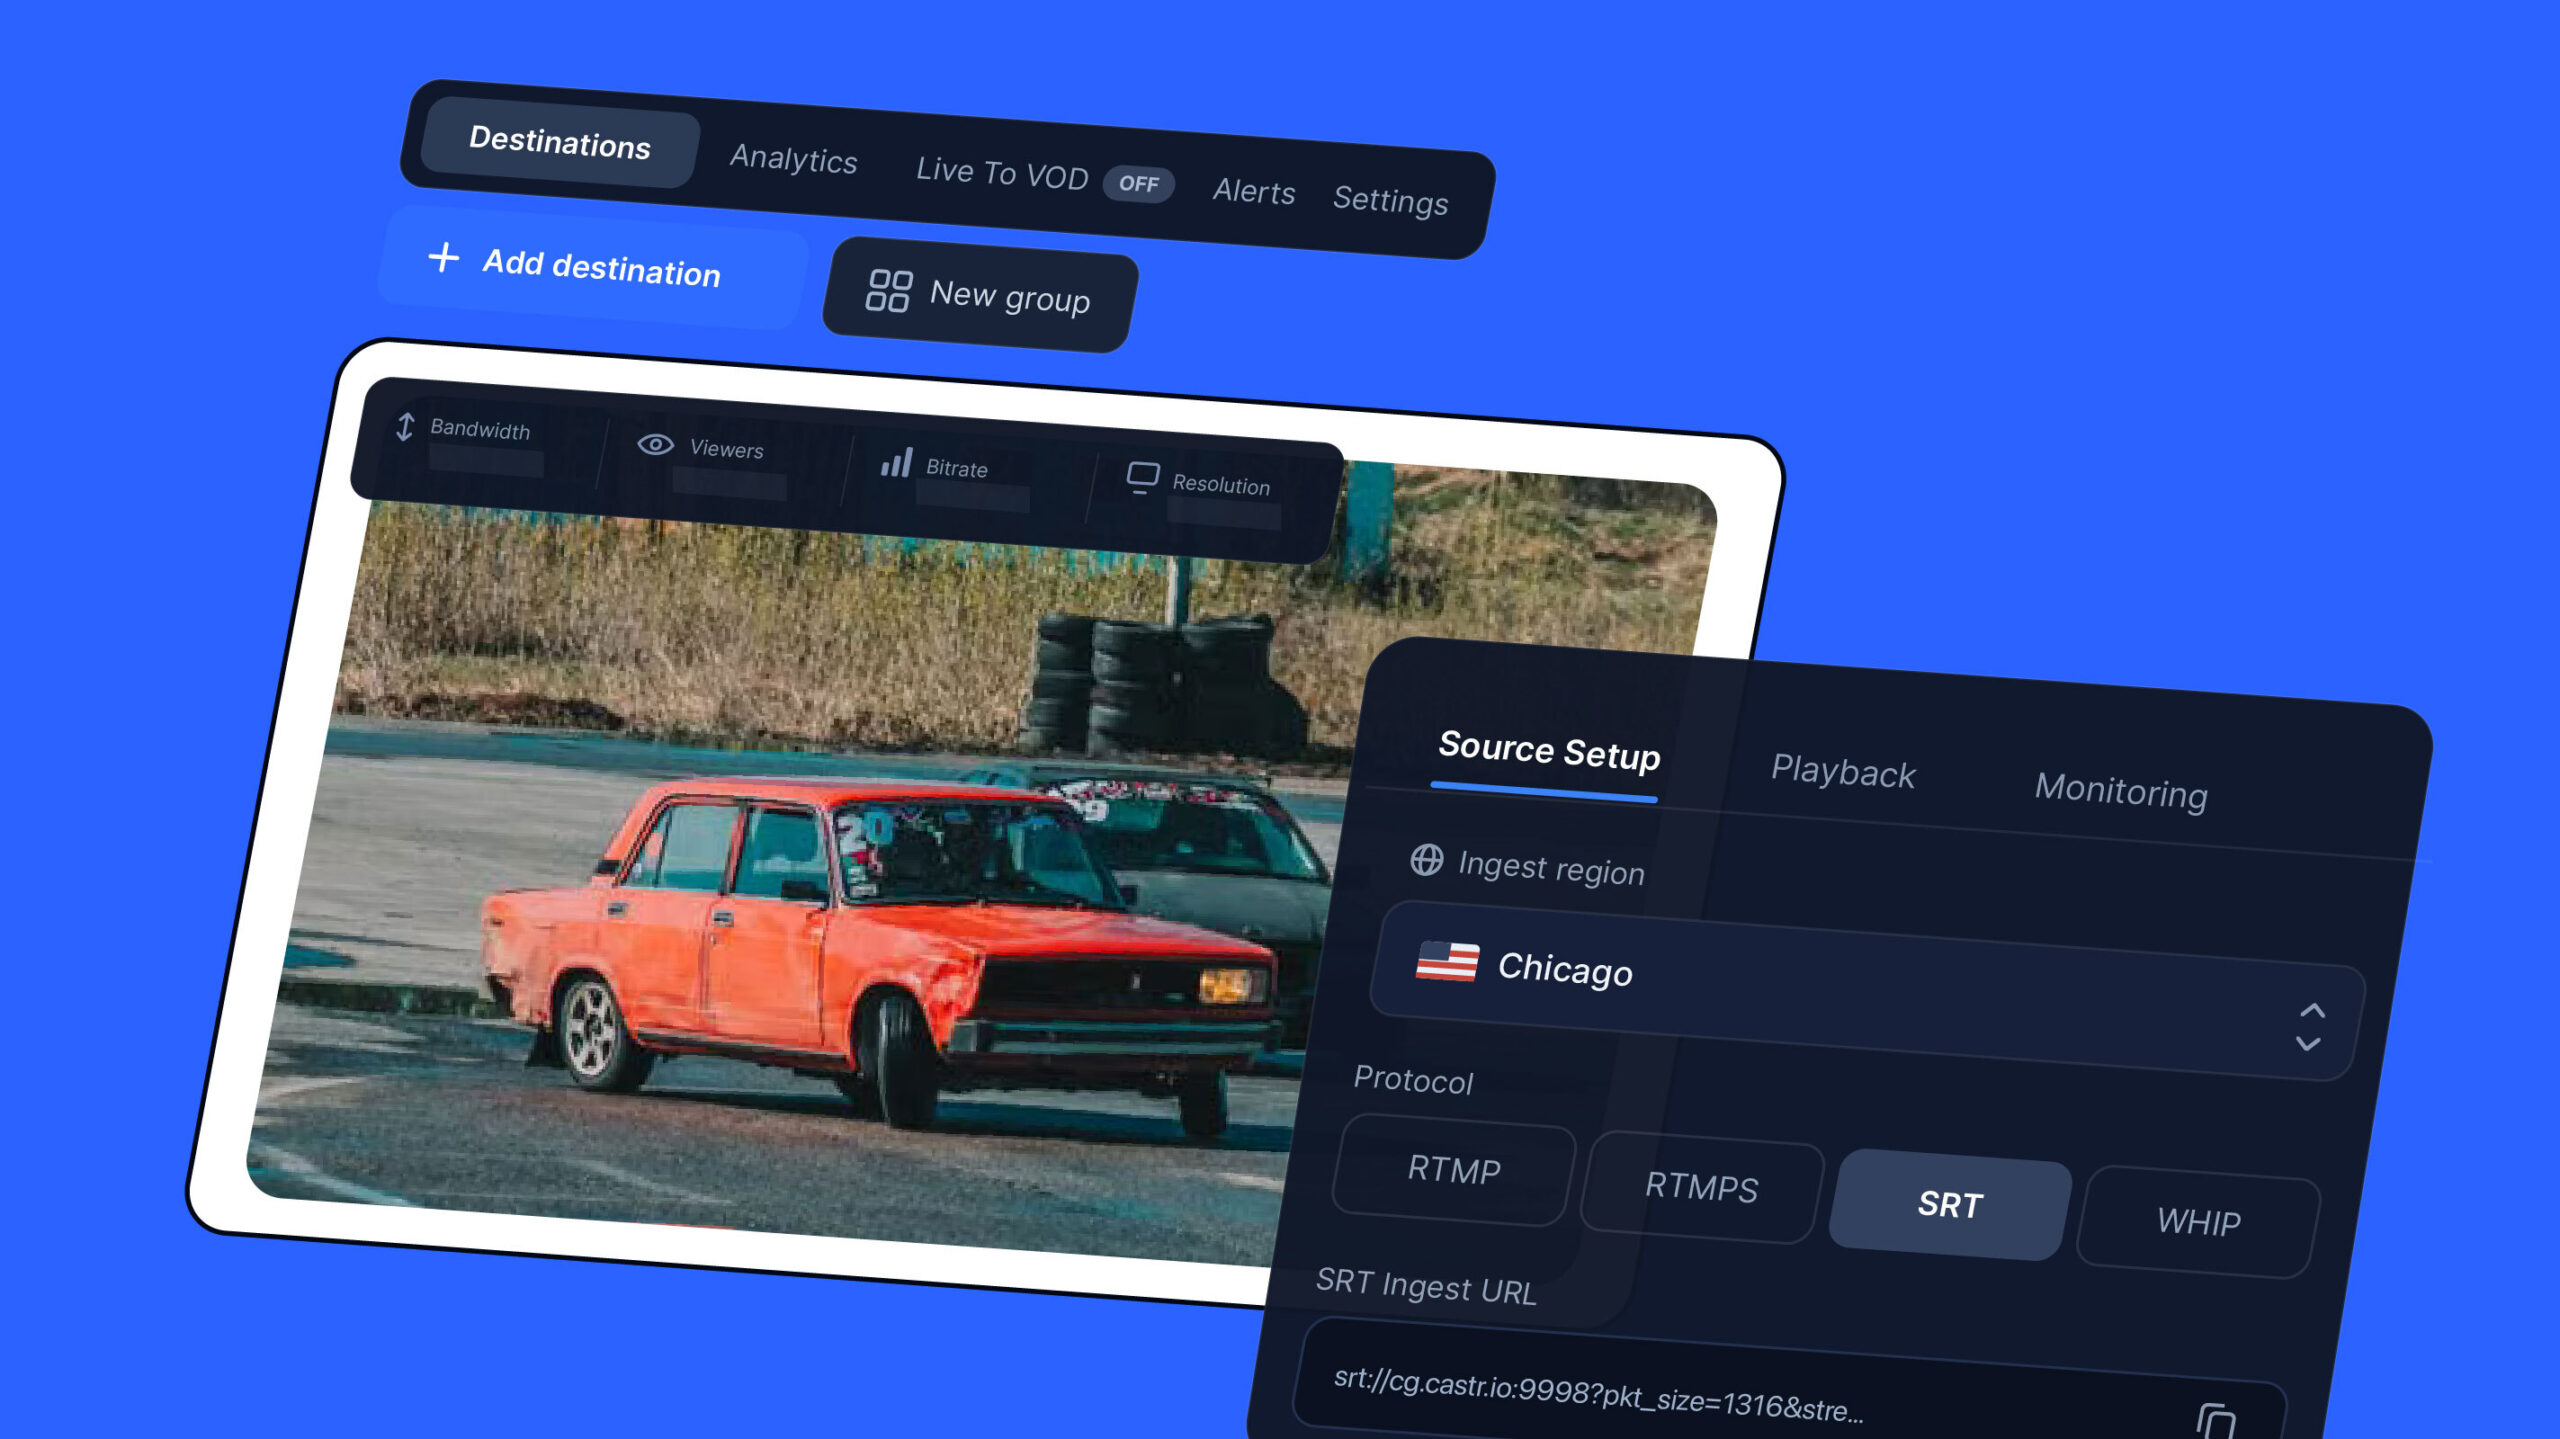
- Optional: A video streaming software like Castr for advanced features (e.g. multistream, OTT streaming, stream to social media and your website, analytics, etc.)
-
That’s it. These are the items that you need to build a professional studio, even at a low budget. This setup will help your team produce video content in minimal time and with full control.
Key Takeaways
- Having an in-house video production studio helps your team save time and costs with video creation in the long run.
- Essential equipment you need: Camera, tripod, microphone, lighting, and background
- Additional equipment: Extra camera(s) and teleprompter
- Types of cameras: 4K professional camcorder, camcorder or handycam, DSLR, webcam, or phone
- Types of microphones: Lavalier, boom mic, and condenser
- Lighting setup: three-point or two-point
- Extra tools for video livestreaming from your studio: a capture card, an encoder (software or hardware), and a video streaming service (optional)
Join 200,000+ streamers worldwide
With Castr, you can easily livestream videos on any platform in no time.

No Castr Branding
We do not include our branding on your videos.

No Commitment
No contracts. Cancel or change your plans anytime.

24/7 Support
Highly skilled in-house engineers ready to help.


![The 10 Best Live Streaming Encoders [Software and Hardware]](https://castr.com/blog/wp-content/uploads/2026/07/Best-Live-Streaming-Encoders-1-scaled.jpg)